Just climb it as shown using Axiom Palm to pull yourself towards the right ledge at the second section. The climb starts at 1:44 in the video. The grip jump is at 1:58
Puzzle 1
Climb the wall immediately to the left, jump on to the platform. Rewire both the sections by holding down the ctrl key (whichever you have set to shine the lantern).
Puzzle 2
Latch on to the disc on one end and rotate till it connects then force palm the center.
Activating the skybridge
The lower laser connector must be left untouched. In the video the walkthrough starts at 21:52. Climb the wall behind the lower laser pointer then when you reach on top make sure to connect both the laser pointers on either side
Next cross over to the other side and join any disconnected wires, highlighting them will show which one is still not connected.
Important note over here is to avoid running into the purple glowing plants as they drain HP.
Death resets the puzzle as I have realised at 27th minute mark in the above video. All the locations of the points of interest have been marked in the description of the video. Finally force pal the disc by clinging on to it to activate the console for the Skybridge activation.
Boss Fight
Boss fights are pretty easy as long as you have a good supply of food. Just heal tank if you are bad at them.
The Excavatron is an early game boss at the Karin Quarry and needs to be defeated inorder to free the blockade at the location. This boss fight is very easy once you get the hang of it but requires proper stamina management and also the Dodge passive in Keen Senses in order to save yourself if you ever get trapped in the drill attack animation.
Preparation:
Theres a lodge nearby caled the Cairn House as can be seen in the video just west of the location of the Excavatron Arena. Here there is plenty of fish that you can catch as well as mushrooms that can be harvested. Make sure to stock up on both as you may require to refill the moment you get low on HP or Stamina. The other thing u might require to have at hand is the Palmer pill.
HP Restores Stamina Restores Keen Senses – Dodge Upgrade Stamina Upgrades (as much as possible)
Make sure to gather Fish and Mushrooms and cook the fish at the Bonfire to fill up your reserves.
Balltle strategy:
Attack Patterns The excavatron has a few basic attacks that involve drilling the ground right in front of you as well as a lunge attack. These attacks can be dodged easily. Following this there are two major skill attacks where it digs under ground, here you will notice two different patterns.
Dig Attack Type 1 This is a less agressive attacks where the screen will be normal, it will start digging then as in moves you will notice the ground erupting make sure to consume mushrooms that you collected earlier to restore stamina if you are low. Nest start running till the eruptions stop after which there will be a single big eruption. Make sure to dodge.
Dig Attack type 2 During this attack you will notice the screen darken and a bright yellow glow on the enemy. After every three erruptions it will emerge out dealing massive damage so make sure to dodge only after the third erruption. This sequence will repeat thrice in quick succession. After it emerges ou of the ground you won’t be able to attack it as it will have a shield and without force palm you might be helpless here, so wait for it to attack.
Attacks should always be initiated after the enemy makes the first move.
As we progress across the storyline we come across various monsties that seem cool but after a while they seem either slow or as if they serve no puprose towards progressing. This causes one to switch between monsties hurting the experience gain not by much but as you reach certain stages of the game you realise that you have been missing something that could actually benefit in a fight or to cross certain parts of the terrain. So here is my top 3 list of must have monsties apart from Ratha ofcourse since we cannot switch it out. These are the best monsties that you need to have before the endgame starts.
This is on of the best Monsties by far. I would put this one in the S+ tier since it runs like the wind, flies and even climbs walls. The best part is you start with it and most likely will end up keeping it even during the endgame. Attacks are based on speed and has skills that increase the dodge chance (Heat Shimmer) as well as restore stamina and provide stamina regen boost (Charge Up). Another thing of importance here is soon after using Kinship Skill it directly gets into the High Voltage state which increases its damage output. Later on with a bit of Rite of Channeling you can include Power (Bolt Flash) and Tech type skills to win those 1v1s.
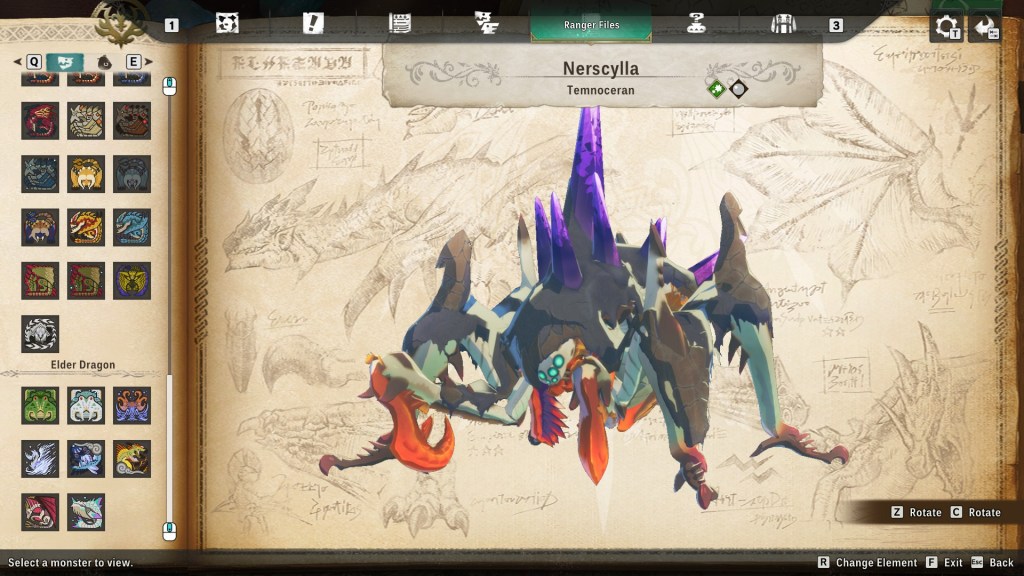
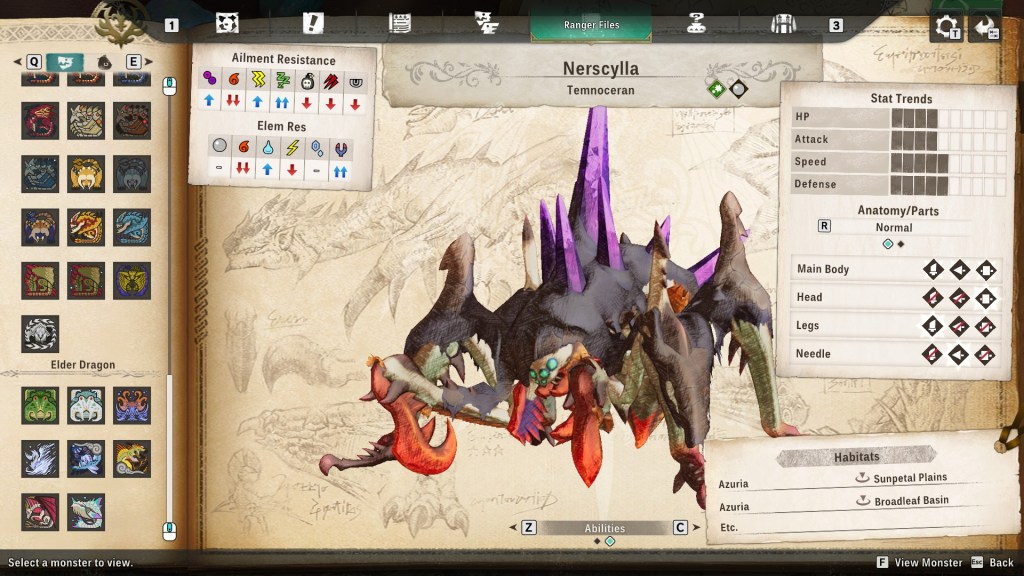
2. Nerscylla
Advantages: Battles (Sleep into Sleep Chaser)
Nerscyalla early on can help you in your battles and execute some really clutch plays by putting the enemy to sleep, this can cause not only the enemy to sleep to miss a turn and heal your team but it also has a follow up attack that does more damage to a sleeping enemy. Defeating Nerscylla also lets you craft sleep ailment weapons that stack towards its sleep needle. It’s not that handy at helping you navigate through terrain but makes up whatever it lacks for in that aspect, in battle.
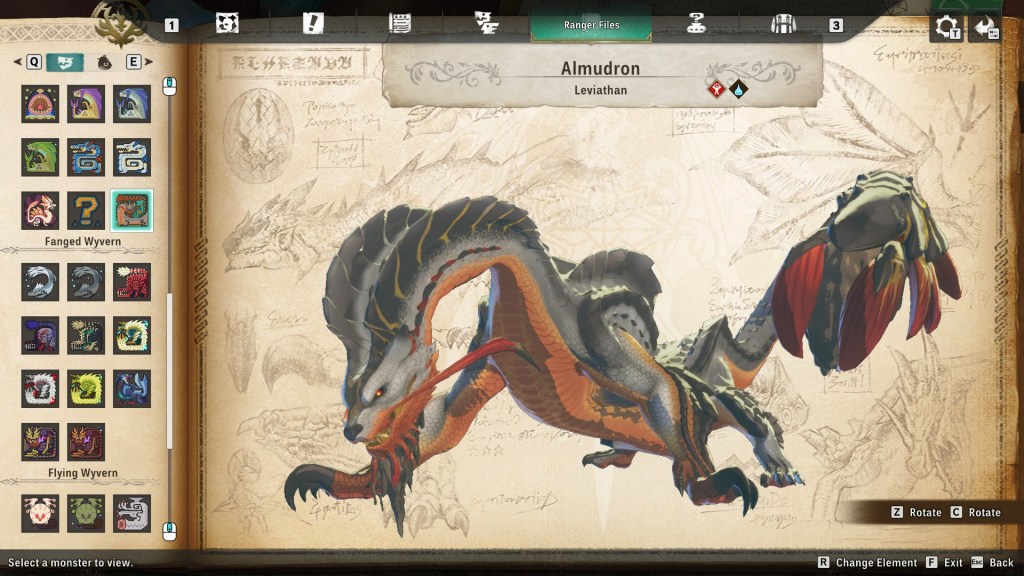
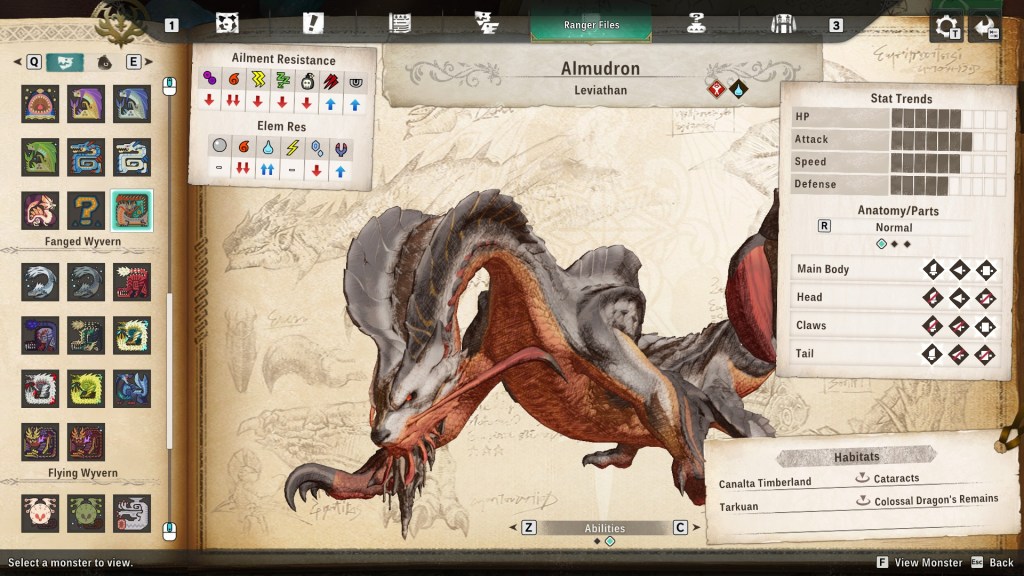
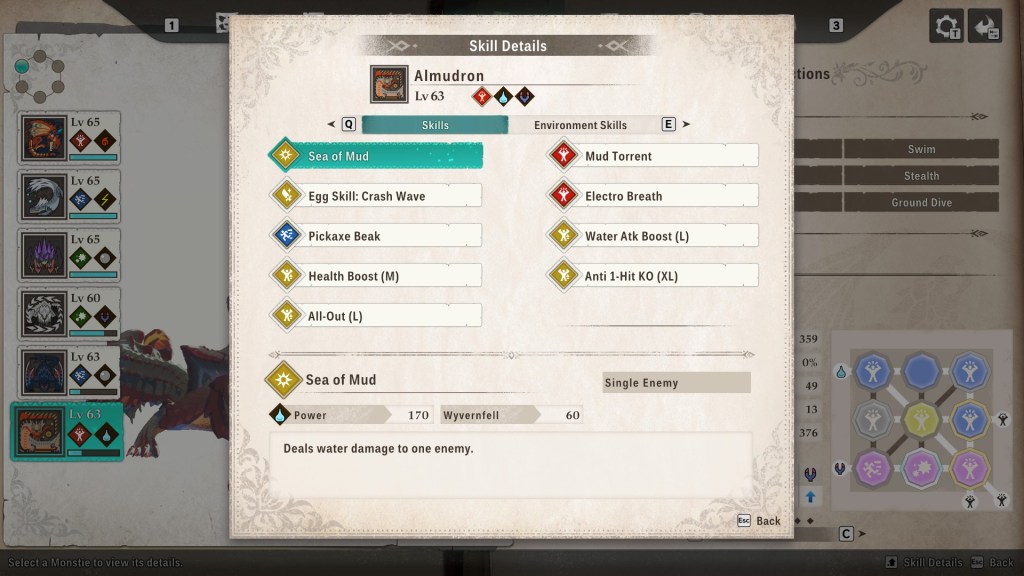
Almudron is one of the best Monsties out there that can help you in battle as well as perform the tasks of two slots. In the begining you will find yourself hosting two separate monsties to Swim and Ground Dive but as soon as you enter into the mid games this is the first boss fight that you encounter and finding its eggs is easy as well. It has skills that can do damage over time and hits multiple enemies (Mud Torrent) and later on you just need to add Crash Wave for massive damage. It also has dragon affinity so slotting in a skill like Pickaxe Beak will help a lot later.
The game has reached it’s end and you have to face Aenshin’s Final form. You are forced to play with Simon as a companion for this fight so it can be a bit difficult if you are underlevelled and there is no shame is restarting to pre battle or an old save. Recommended level is 80 on Ratha and Zinogre Armor helps tank all the one shots and screen wipes. This is an easier battle as you can use Lunge strike stance to act as a support whilst dishing out massive damage numbers and keeping the kinship gauge progress always active. Make sure to create two individual saves before you start this since after this battle the game ends.
This guide does not even require you to get any items from the calamities, at this point for me all my calamity Elder Dragons are still active although I could defeat them easily. Also get ready for quite a long cutscene and don’t miss the cutscenes in between the credits.
Loadout
Food Type: Contingency Stew – Fills the Kinship gauge faster
Armor: Zinogre Armor (Dragon Def Boost XL + Elemental Assault L) This setup will help you tank the screen wipes as well as single target attacks
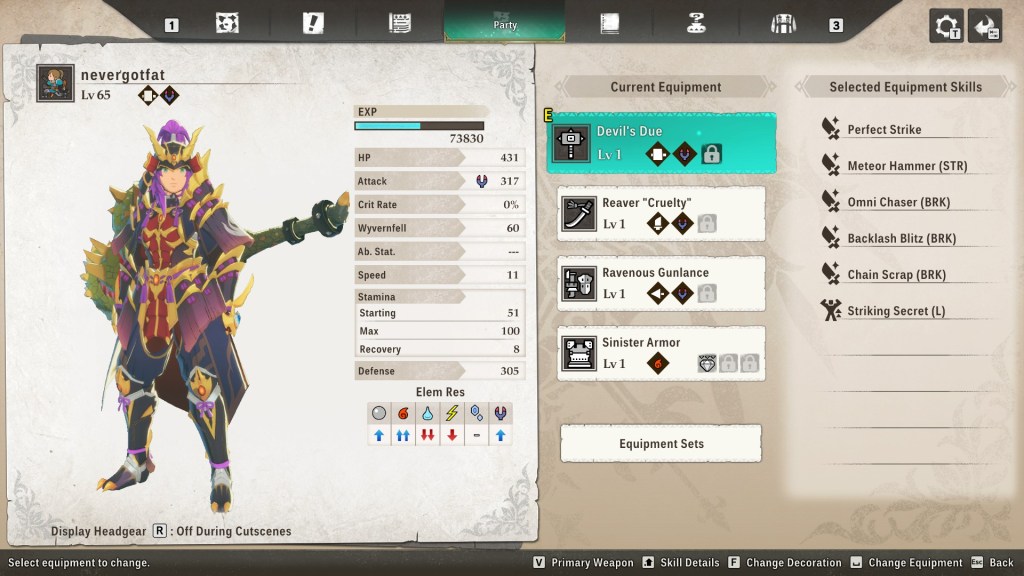
Weapons: Yeti Hammer L3 + Reaver “Cruelty” Longsword L1 Since we are forced to party with Simon who has very weak support skills we have to first go on the offensive and break the Core, then switch to Longsword
Monstie: Ratha (Lv. 80) (Fire Cluster+ & Savage Fireball) For single target attacks use Savage Fireball and save Fire Cluster+ for when the Srystals spawn Raths Skills: Active Skills: Savage Fireball, Flare Cluster+ Passive Skills: Fire Atk Boost (L), Self Heal (L) Environment Skills: Resonance+, Best Buds, Unscathed
Items: Lifesoot, LifePowder, Mega Potion, Vital Essence & Mega ArmorSkin These and other healing items are required and we will be using them when in Lunge stance
Battle Strategy
1] Start with Yeti Hammer on the part thats weak to it (Always break this first) 2] Keep using Savage Fireball and use Fire Cluster only when you see multiple targets 3] Use Kinship skill only when both crystals spawn, use the AOE to break the part weak to hammer as well as both crystals this way (@2:43) 4] After breaking the part weak towards hammer switch to long sword (@3:34) 5] Spirit Blade to gain 2-3 charges (Switch to Lunge when there is no single target attack incoming) 6] !!!IMPORTANT!!! Once you are in Lunge stance it remains that way if you keep using items instead of attacking this way the attacks keep happening as well your team keeps getting buffed and healed 7] In this mode attack only when Aenshin is targetting you for 1v1 8] With this method all of Aenshin’s 1v1s are always TECH Type
As can be seen in the video above at first fully focus on doing max damage to the part weak to the hammer, always stay in Power Mode (Red) since with this method Aenshin will always be forced to attack only when its in Tech state (Green). As soon as the kinship gauge fills for both characters use it ASAP, this will destroy the core weak to the hammer.
Next switch to the Longsword keep using spirit blade and switch to Lunge stance once you get 2-3 stacks. Then the moment you get into lunge stance focus on healing the restoring vitality and finally getting the armorskin up. You do not exit Lunge stance when using items so you will be attacking any time a party member attacks which is exactly what we need. This helps us keep the DPS up and act as a Support at the same time.
Points to note:
Always stay on the offensive when Aenshin is single targetting your team. The moment you don’t see any attack lines is when you heal and makes sure you always have 2 hears of vitality to tank it.
Finally you are at the endgame and have reached the point where the major battles start. This is one of the most complicated battles of the game especially after facing Battle Bound Lunagaron. The thing to note here is that this is not the end of the game. That being said let’s focus on how to defeat this Stage first.
Battle Strategy
1] Important Note BrightFlash Expurgation is cast on turn 1 by Aenshin so make sure to use Dragonguard powder if your team keeps getting wiped This as well as Blightgale Expurgation (a lesser fullscale attack) affect the entire team so if you aren’t riding the monstie or don’t have the proper gear equipped you are sure to get knocked down.
2] Offense and defense Always attack as long as Aenshin is attempting a 1v1 (indicated by blue or yellow marker) or direct attack (marked by a red streak on the ground) Aenshin will always keep doing normal attacks that are single target so make sure to take advantage of these turns and keep the offensive at it’s peak. The moment Aenshin is not targeting anyone the next tur will be a screen wipe attack.
3] Fight States and Attacks Aenshin’s power states can be identified by looking at it’s eyes. It starts in the Tech state (Green) this is indicated by his shut, black eyes and then in its enraged state it changes to Power (Red) Omni Chaser (use to conserve stamina) and Perfect Strike (keep this for stagger chance or if you are gonna get wiped as an all out) Omni Chase and normal attack is our bread and butter for this fight. Use perfect strike when you want an assured stagger or if the Kinship gauge is about to fill up.
4] Wyvenfall Gauge and Healing Don’t be afraid to go all out when there are last 4 diamonds remaining on Aenshin’s Wyvernfall Gauge, the stagger will stop it’s next attack. Heal and refill hearts to 3 only once you notice Aeshin’s preparing for a teamwipe
5] Monstie and Kinship Tips Never use double Kinship. Ride the monstie but use normal or skill attacks till you don’t see any single player attack lines from Aenshin, make sure to use only Single Kinship Skill to stop his wipe. We use single everytime to offset the attack from Thea so that even if the Wyvernfell gauge is not broken Thea is most likely to follow up with her own Kinship attack.
7] Point of Focus of attacks Attacks should always prioritize the shell, breaking it triggers a stun of sorts. The important thing to keep in mind here is that it must not be attacked when it’s glowing as that results in an automatic counter.
Monstie: Almudron Active Skills: Pickaxe Beak (Speed), Egg Skill: Crash Wave, Mud Torrent Passive Skills: Water Atk Boost, Health Boost, All Out, Anti 1-hit KO Env Skills: Resonance+, Best Buds+, Tech Resillience+ Magnamalo Set L1 has Dragon Defense which when coupled with a Dragon Def Boost (L) gem can help you tank the biggest attacks from Aenshin when you HP bar is full.
Food Buff: Bubbling Magma Stew This will increase Stamina and Wyvernfell damage power
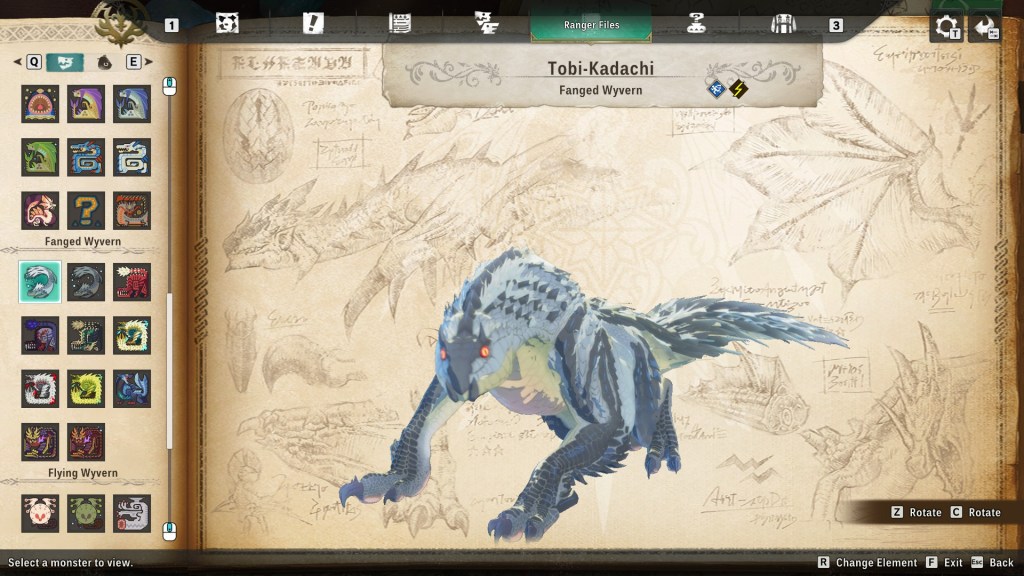
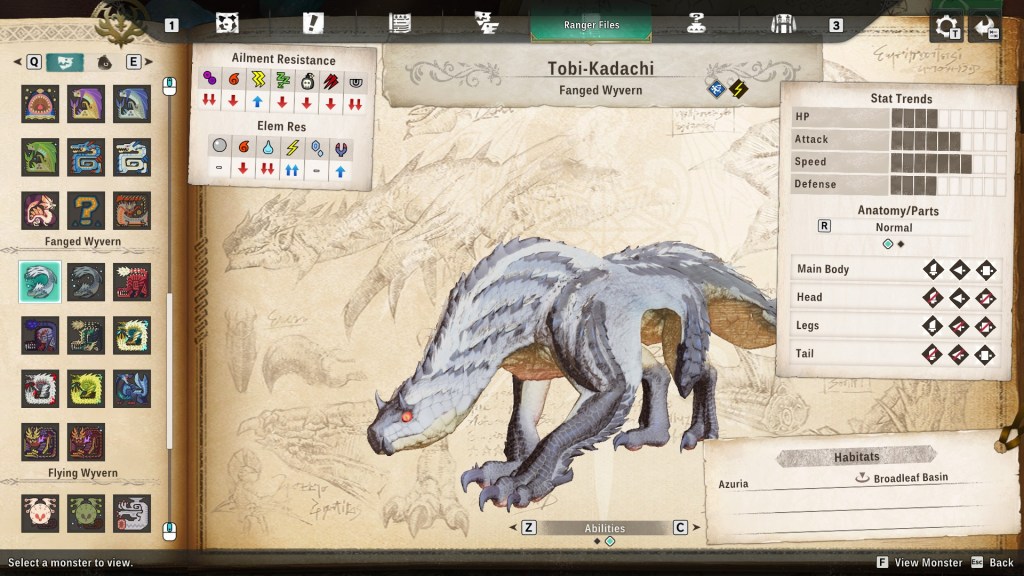
Companion: Thea + Tobi Kadachi This is the best combo since Thea does perfect counters and Tobi Kadachi is effective against Aenshin.
Summary
This is one of the most satisfying battles of the game as you have to plan every attack and heal, you cant just expend stamina liberally. Every single state of the attacking monster as well as your companions has to be taken into consideration, with a major focus on delpeting the enemy’s Wyernfell gauge inorder to incapacitate and disrupt it. The battle does allow a few mistakes especially since we can use Vitality Essences to stay in the battle but focusing too much on healing without attacking leads to an opening for Aenshin.
Arveld marks the end of the mid game with the battle being quite technical it takes a few tries unless you have prepared quite well. In the fourth biome at the end of the map we find Malzeno guarding the Sacrosanctum after which we have to face Arkveld. This fight can be difficult especially if you have reskilled Ratha and have missed the Mega Demondrug in the loot chest at the entrance.
Loadout
Player Armour:
Diablo Nero Armor (Black Diablos) Instigator Gem (Since 1v1 can be countered) Also to divert any attention away from Ratha Yeti Hammer I (Goss Harag)
Ratha: Savage Fireball (Remove any other lesser Active skills to conserve Stamina) Ratha will use Power Attack or Second Wind the lesser skills you have Environment Skills: Hardiness + Resonance (From Excursions)
Items: Mega Demondrug (Very Important) + Vitality Essence
Teammate: Gaul (Free Heals and Vitality + Debuff on enemy)
Note: A speed skill on Ratha will help you win most of the 1v1s which will be really helpful.
Phase 1
Basically with this setup we keep hitting the head to score big points on the Wyvernfall gauge. Destroying the head also reduces Arkveld’s attack power which is required since the fight progresses you might fall short of vitality essences.
Arkveld’s States Normal Form: Technical Stance (Counter with Power stance) Enraged Form: Power Stance Note: A speed skill on Ratha will help win 1v1 but since we have Gaul he will restore our vitality
Attack till turn 6 and use Mega Demon drug on Ratha (Without this Savage Fireball won’t trigger phase 2 and Arkveld will keep being aggressive. This is usually indicated by Odgen and the dialogue will inform you that Ratha should use the Savage Fireball skill.
Hammer is used to break the head first since won’t have enough firepower to break the wings unless we have farmed monsties in the Sacrosanctum biome
Breaking the Head reduces Arvelds’s firepower.
Phase 2
Hammer is very good here since it helps increase or decrease the Wyvenfall gauge very quickly. It even helps prevent Arkveld getting enraged since the hammer can overfill the gauge which shortens the gauge. Always keep the Vitality at two hearts for the Main Character.
Location of the Mega Demondrug
At the entrance door of the Sacrosanctum immediately towards the left is a treasure chest in which you will find the Meg Demondrug
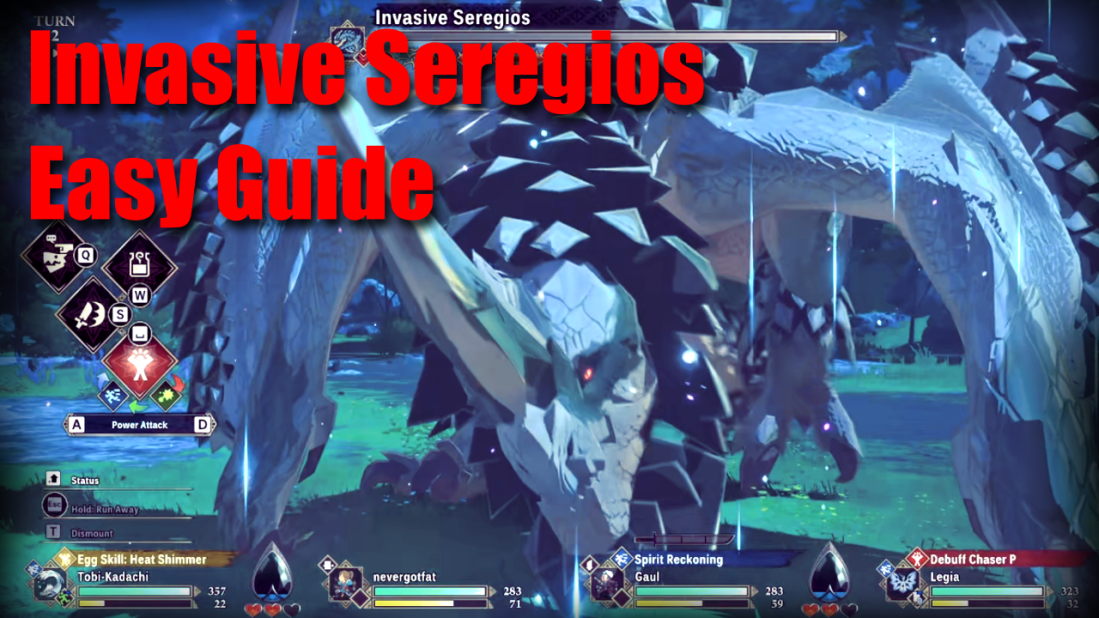
Invasive Seregios can be found in North East Azuria. This Monster spawns at night and defeating it will unlock an Astalos egg. This is an easy guide to defeating it which requires very little effort.
Requirements
The Team should comprise of the following Team Player: Any Armor Item: Vital Essence x2 Weapon: Hammer (Any Skill with BLNT) Monstie: Any Speed Monster with Shimmer Skill
SecondMember Gaul + Legiana (Chance to restore Vitality + Heal)
Pre Battle Strategy
The main idea of the battle is to reflect the scales back to Seregios. This can be done by using a Hammer with a Blunt Skill. We use the Dodge Buff on the monstie so that we increase the chances of dodging the first wipe so that we can save on the Vitality Essences. Gaul is on the team so that he can heal us as well us restore Vitality. The taunt skill can get the Seregios to target you early
Battle
Cast Dodge on monstie and use any normal attack to conserve Stamina. Next continue till Seregios initiates a 1v1 against you. At the end of every turn Seregios will always start with a roar that has an aura, so we have to counter this with an opposing Skill colour. Make sure to make a note of this. The above video shows what happens when the wrong Skill type is selected.
Winning just a single 1v1 will end the battle. This will cause Invasive Seregios to retreat to a den so make sure to collect the Astalos from it.
Lingonberry Leather is a crucial item required to craft Tier II gear and items. Its also an important component of a variety of armours and weapons. As one progresses through the quests they may find 2 Lingonberry chunks at one of the outposts but the player will struggle finding Lingonberries in the open world. This is since the Lingonberries grow in an obscured region of the map which is very difficult to access even if one has thoroughly explored the map.
Location
The berry bushes are located withing the northwestern hedge bush section of the map which starts after the Wooden Patio. There are two points of entry one where the Patio ends near two big black trash bags and the other further north.
Markers
The first marker is the Wooden Patio of the snack bar. This is easy to spot as its a wooden structure easily visile on the world map next to the snack bar. Incase you are still finding trouble then its to the left of the first time you exit into the park after completing the tutorial and before reacing the first Ranger Outpost.
The second marker is a plastic spork (Spoon with a Fork at the tip) that forms a ramp to take you to elevated ground. This is visible as a small white streak north of the wooden patio and is mentioned in the above video. We use this to reach the 2 Black trash bags.
The third marker are 2 mushrooms near a small grey stone once you climb this you will find a small stick leading to the entry to the ledge within which the Lingonberries grow. If you donot have a mount bring enough materials to craft workbenches which will allow you to climb the rock.
Tips
Make sure to carry a ranged weapon as the berries are a bit out of reach.
Carry some healing consumables as there are various groups of enemies that might overwhelm you.
Your Omniaxe has to be level II to harvest Lingonberry chunks from a lingonberry fruit.
Out of research points? Is it taking you forever to gather materials? Is fishing whoppers turning into an impossible task? Well there is no need to worry, following is a guide to get the best endgame gear to help you with all of the above. This build will allow you to gather more materials per node and help stabilize your fishing, in turn helping you get research points faster. Research points are required for many different things such as creating and maintaining pop up camps, resting to change the time and season, creating investigations and trading for the materials at the Support Ship Trader Santiago. Materials on the other hand are required for crafting and trading. Fishing is crucial when it comes to gathering materials to craft some usable items, weapons and armor that require drops from various fish.
The Plan:
For gathering materials we will need Botanist and Geologist. For Fishing we will need Outdoorsman and finally we will use the Buff of Forager’s skill which increases the chances of finding rare gathering nodes.
The Build:
Head:
For the head gear we will need to craft the Square Glasses. Following is the list of materials required: 1] Novacrystal x1 (Windward Plains, Scarlet Forest, Oilwell Basin, Ruins of Wyveria) 2] Lightcrystal x2 (Windward Plains, Oilwell Basin, Ruins of Wyveria) 3] Gracium x2 (Iceshard Cliffs – High Rank) 4] Icium x4 (Iceshard Cliffs) Cost: 4000z
Getting this particular head gear will give the character Max level of Botanist and Max level of Outdoorsman.
Pants:
For pants we will need to craft the Azuz pants. Following is the list of materials required: 1] Azuz Tanned Leather x1 (Trade Exchange Material: Azuz) 2] Firestone x2 (Oilwell Basin) Cost: 4000z
Getting this particular leg gear will give the character Max level of Geologist.
Arms:
For arms we will need to craft Melahoa Branch α. Following is the list of materials required: 1] Great Hibiscus x1 (Trade Exchange Material: Ren & Gawdygog) 2] Guardian Seikret Feather+ x1 (Guardian Seikret – High Rank) 3] Lightcrystal x1 (Windward Plains, Oilwell Basin, Ruins of Wyveria) Cost: 4000z
This piece of armour will contribute towards the Forager’s luck skill.
Waist:
For the waist we will need to craft Melahoa Folia α. Following is the list of materials required: 1] Great Hibiscus x1 (Trade Exchange Material) 2] Guardian Seikret Feather+ x1 (Guardian Seikret – High Rank) 3] Lightcrystal x1 (Windward Plains, Oilwell Basin, Ruins of Wyveria) Cost: 4000z
This piece of armour will contribute towards the Forager’s luck skill.
Chest:
For the chest we will need to craft Melahoa Jacket α. Following is the list of materials required: 1] Great Hibiscus x1 (Trade Exchange Material) 2] Guardian Seikret Feather+ x1 (Guardian Seikret – High Rank) 3] Lightcrystal x1 (Windward Plains, Oilwell Basin, Ruins of Wyveria) Cost: 4000z
This piece of armour will contribute towards the Forager’s luck skill.
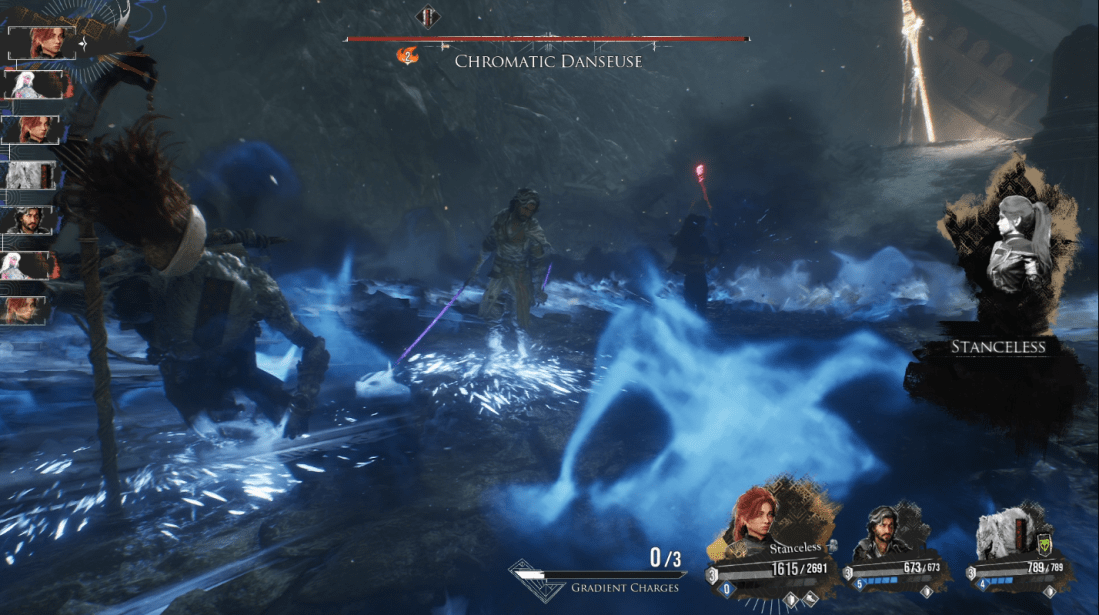
As we progress into mid game we encounter enemies that throw the entire team into a disarray, AP drains and chain stuns just ending making you lose hope in your party pretty quickly. To counter this you will have to level up to make your characters tanky or higher than the current level of enemies. Though there is an alternate way to make things work and it comes at a cost by humbling Maelle and letting her tank. Maelle’s defensive stance has a 50% damage reduction and with a few other Pictos and well slotted Luminas she can be an impressive raid boss.
Summary of the Build
Maelle will not only be taking the hits from enemies but also provide AP to the other team members and preparing a setup for Verso. Verso on the other hand will be the main Break generator. Monoco will be our utility, dealing multitarget damage, healing and reviving.
Maelle’s Build
Weapon: Duenum (+1AP to allies when maelle gains AP) Skills: Egide (Protect Allies from single target damage)
Pictos: In Media Res Pros: 1.3k DEF + 3 Shields Cons: Life is halved
Recovery Pros: 2k health + 324 DEF
Healing Counter Pros: 700 HP + 25% Heal on counter
Luminas: Dodger (+1AP share to team) First Strike (Cast Egide First) Burning Shots (Important for luck)
Energizing Start I II & III (AP Gain) Staggering Attack (Break) SOS Shell (Defense)
Description: Maelle will open with free aim shots to try and set an enemy on fire (keep AP for Egide)
Verso’s Build
Weapon: Dualiso (Free base attack) Skills: Assault Zero (5 hits to get to B Rank faster) + Perfect Break
Description: Verso will start by doing 3 free aim shots (his AP meter will be mostly be full after Maelle’s Egide), prefereably on a burning target (which might be set ablaze by Maelle’s 20% on free aim). Follow up with a base attack since Dualliso has a free hit. Then follow up with Assault 0 or Perfect Break.
Pictos: Any (Have not figure out this guy yet) Mostly use those that have high health and defense passives
Luminas: You can use the same as Verso’s but I have very low Lumina points for this dude Auto Rush Auto Shell Recovery Combo Attack
Description: Always use the Upgraded Skills as they will provide AP to party members. Use this guy’s turn to revive and heal Maelle in case she dies. Always use CC spells (Ones that hit multiple enemies).
Notes
1. Maelle can change into Virtuose Pose upon collecting enough Gradient charges and triggering the same. After the Gradient Attack you can follow up with Momentous strike or Fleuret Fury for huge damage. This can be done at the end if things are in your party’s favour or when the enemy is broken.
2. Make sure not to waste Verso’s Free Aim shots if his meter is full, use 2-3 free aim shots then a base attack to refill them.
3. If Maelle dies use Monoco to revive and heal her.