Fallout 76 – Mistress of Mystery

Introduction:

Fallout 76 has a fair share of quests some of which even need to be replayed in order to experience all the different scenarios. Other quests are dailies and events. Among all of them some are considered to be critically acclaimed by the community and we will be delving into the most interesting quest called the Mistress of Mystery. This quest is part of the Faction quests for the Order of Mysteries and is the last quest of the entire chain. The questline can be activated upon discovering the dead corpse of a young women on whom we find a damaged Holotape and a Worn Veil belonging to the Order of Mysteries. The corpse is part of randomly encountered events and can be found at various locations across Appalachia.


The Mission

After successfully completing Seeker of Mysteries the player is finally able to access the Headmistress’ office. It’s finally time for some clarity on this whole mess of events that occurred. Going back to a cryptos terminal you will finally get to access it as Olivia and authorize access to the Headmistress’ office. A hand scan terminal outside the office grants the player access to her cabin and upon accessing the terminal and reading the message sent by Olivia we finally find out that she came across members of the order gossiping about how they knew they were suspicious about her. She confesses to killing them and how she then wanted to get rid of the entire order, with a final message to her mother suggesting that meet at the usual spot they used to meet on the day of her birthday.


The Final Events:

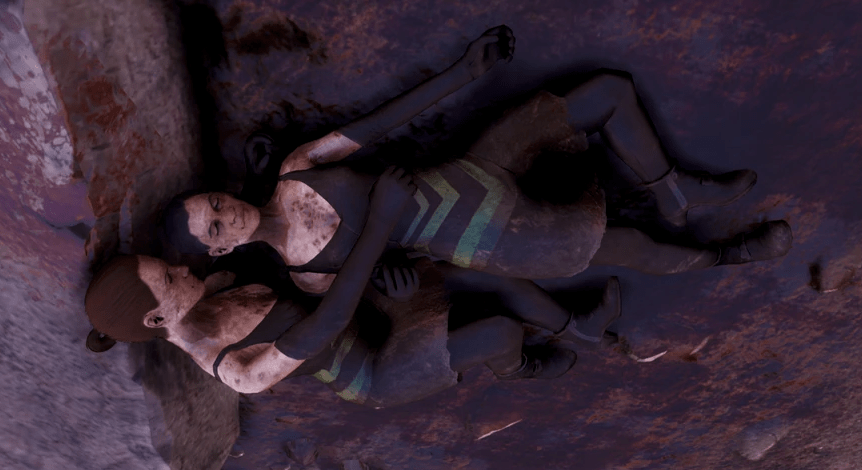
At this point you will unlock the optional quest to search for clues regarding the meeting place, which can be found on Olivia’s terminal using her credentials. A new location marker appears on the map just north of your current location known as Seneca Rocks. Once you reach the place you will find the dead bodies of Olivia and her mother, the headmistress Shannon Rivers. Upon interacting with them you find the Holotape that has the recording of the final moments between the two of them. You can initially hear Shannon requesting disclosure and her daughter explaining how she was tired of the way they were operating. Olivia ends up killing her mother with the help of Brody, a raider who was assigned the task of doing away with the entire order. At the end he betrays Olivia finally putting an end to the entire Order of Mysteries.


Conclusion:

Now if we go back to the cryptos terminal we can finally login as Headmistress Shannon Rivers. You can access a few new things and promote yourself to the rank of Mistress of Mystery. The Holotape that you receive has an entry of Shannon delivering her final message, welcoming you as a full fledged member of the Order and briefly describing her reasons for the order. Apparently she had high hopes for Olivia and could not stand what her daughter had turned into at the end.

Fallout 76 – Billy Beltbuckles & Atlantic City’s Tax Evasion

Introduction:

The latest update to one of the most popular MMO by Bethesda introduces an entire new expedition location in the game. Atlantic City – Boardwalk Paradise, released in December of 2023 as an expansion to the current map of the game introduces an entire new region and characters for the players to interact with that can be accessed via the expeditions section on the map. Players will require access to the vertibirds as a prerequisite in case they haven’t unlocked them yet. To go to Atlantic city simply open the map and in the expeditions menu select Atlantic City.

Once you get to the new area you will come across quite a few prominent NPCs such as Salvatore AKA Sticky Fingers, Buttercup, Juchi and Jullian Batsuuri, Mother Charlotte and Veracio Cruz who have their own quests that they will assign to the players upon speaking to them. We are not here to talk about them but rather focus on the most interesting quest of them all which is none other than Atlantic City: Tax Evasion. Before proceeding to the mission area make sure that you have tons of ammo and have carried all your correct equipment. This mission may involve defending target areas from a number of waves and having your best equipment will also allow you to complete the missions in a timely manner earning you bonuses at the end.


The Mission:

On your first playthrough you will receive a notification for the mission and will have to head over to the Casino Entrance where you will find a showman holding an NPC at gunpoint. After getting a little bit closer and inspecting the scene we find out that the person who is on his knees is none other than Billy Beltbuckles AKA William, the Mafia’s accountant. Upon eavesdropping on the conversation we find out that the showman is apparently sent by Mother Charlotte to collect her dues from the accountant that the Mafia owes her. We also find out that the Atlantic City Municipal Government is after them as well for the same reason. Upon listening to his whole ordeal we find out that the Mafia cannot help him with his worries and he needs an external source to help him with his problems.

The mission itself is divided into three different phases. First two phases are randomly assigned from a predefined list of missions, whereas the last phase always involves saving Billy from Buttercup. At first we will be assigned a mission from the following:

  • Disable a jammer whilst defending against a wave of showmen.
  • Put down some auditors that spawn around the map.
  • Destroy some evidence by throwing them in trucks whilst dealing with some tax auditors.

As soon as we are done with the set of tasks we are contacted by Billy and summoned to the Neapolitan Casino where we are assigned can be assigned the following missions:

  • Find a vault and swap caps with casino chips
  • Roam around the casino till we find all the bugged locations and destroy the planted devices using a proximity tracker
  • Find and hack a set of terminals used for accounting purposes that have compromising data on them

Bonus rewards will be allocated provided you completed the phases within the time limit. Once the two phases are complete you will receive an emergency call from Billy requesting immediate assistance at the Quentino’s Nightclub. Mission objective changes to save Billy from Buttercup. The place is packed with Munis so make sure you have sufficient ammo. Buttercup himself will be in a suit of Power Armor next to Billy who is tied up.


Ending:

Once you have taken care of the enemies and saved Billy he thanks you only to inform you to be ready for the same set of events for the following week as well. Also if you managed to complete Sal’s missions along the way speak with him as well. Finally head out and make your way to the vertibird that you and your friends arrived in. Speak with Lennox to finally end the expedition.

How to get a great start – Don’t Starve Together

Introduction:

Don’t Starve is an absolutely marvelous indie game if you like dark and gloomy themes and just want to relax on a weekend, who knows it might even brighten your day. A perfect setup for a multiplayer game where you have to frequently adapt to whatever the game throws at you just like normal life. Co-ordination and allocation of tasks is a key aspect when playing with a group of friends to make things. This guide will help you get a perfect start as it emphasizes on materials and tools required to make it feel seamless and also a brief introduction to what can be considered an ideal spot to build your camp at.


Phase I – Basic Requirements:

Tools:

The first few crucial items required are Torch, Axe, Pickaxe and an optional item would be Garland which helps keep your sanity in check well unless you are playing as Wurt. So to craft the above items we will require the following materials:

  • 3 Flint
  • 5 Twig
  • 12 flowers
  • 2 Cut Grass

The above are the minimum requirements and you will need to find more as your tools break down. Flint can be found lying around in the Grasslands and Rockyland biomes, Twigs can be found in Grasslands. Cut Grass can be found in the Grasslands and Savanna biome.

Food:

In the beginning just keep picking up berries and carrots that you will find along the way. Keep consuming them to restore your hunger whenever it gets low. Along the way you might find seeds that birds will desperately try to eat, pick them up and store them for now. To kill a moleworm drop a flint on the floor as he pops out and tries to take it, you can kill it to get a morsel.

Camp Location:

An ideal spot would be at a location where there are lots of spiders, spiders preferred since they drop silk and spider glands apart from monster meat. The camp has to be placed a little bit further from these spots. In case you are playing as Wendy then a frog camp would be ideal.

Tips:

Save tree cutting for logs at night. Just before night time approaches make sure to be in a forest biome or a spot with a few trees, the moment its night light a tree (right click on a tree with torch equipped) on fire and start cutting trees with your axe that are further way.

Make sure to collect the charcoal from the burnt trees. If its burning (slight steam rising from it) just collect it once to put off the fire then collect it asap again.

Don’t pick extra stuff like flowers(more than what is required to make a garland), nitre, mushrooms, annoying mandrakes and dark flowers. Focus on getting to the Science Machine and setting up camp.

If you were unable to craft a torch make sure to run towards the entrance, the Florid Postern.


Phase II – Building the camp

Now on to the next part where we need to setup our camp. First and foremost we need to build a Science Machine to prototype the Backpack, Shovel, Crock Pot, build a Fire Pit and an Alchemy Engine.

  • 22 Logs
  • 28 Rocks
  • 2 Twigs
  • 9 Gold
  • 6 Charcoal
  • 2 Flint

For this we need to find the Rockylands area. In this area there will be two types of Rocks one is a plain looking one and the other will be the one which has golden veins across its surface. We need to break down the one with the golden veins as they drop gold, rocks, flint and nitre. Don’t pick up nitre for now.

Once you have all the necessary items mentioned in the list above proceed to the location with spiders, if you haven’t found one yet just build a temporary Science Machine and just craft the Backpack for now, then farm the extra gold, logs and rocks for the one to build at your base.

In case you already have a good spot for your base, build the science machine and craft the Backpack and equip it. Next craft the Fire Pit, then the Crockpot, Shovel and finally the Alchemy Engine. It is much easier to craft now in Don’t Starve together as you can find the item you need and click on it and if the materials that are part of the recipe themselves need to be crafted they will show a “+”. You can hover over them to find out what materials are required.

Next we have to gather the berry bushes to plant them at the base. Here we use the Shovel to dig up the berry bushes (if you don’t have inventory slots make note of the locations and come back once you have the backpack). Make sure you don’t forget to prototype it at the base near the science machine. Use rotten food to fertilize the bushes

Food:

The easiest crockpot recipe for hunger is the one for Meatballs (1 meat + 3 veggies) and to restore health it’s Trail Mix (1 roasted birch nut + 2 berries + 1 twig). Spider Glands are also a good source of healing and can be used to make Healing Salves.

Tips:

Build the base a little bit away from the trees, water, frog ponds, spider nest, beefalo and pig houses.

Don’t venture into the swamp unless you are feeling brave or build a base in the swamp.


Conclusion:

Now that you are through with the initial phase, don’t waste time staying at the base for too long. Go out and explore. Plan ahead by checking for the next thing to do for which a few example would be crafting the Prestihatitator and the Shadow Manipulator. Also you can herd the Beefalo and adopt pets and don’t forget to find and fight the bosses. Apart from this you will have to prepare for Winter and Rains get proper equipment which will be discussed in further posts. Also don’t forget that there is an entire map of underground cave systems waiting for you to explore.