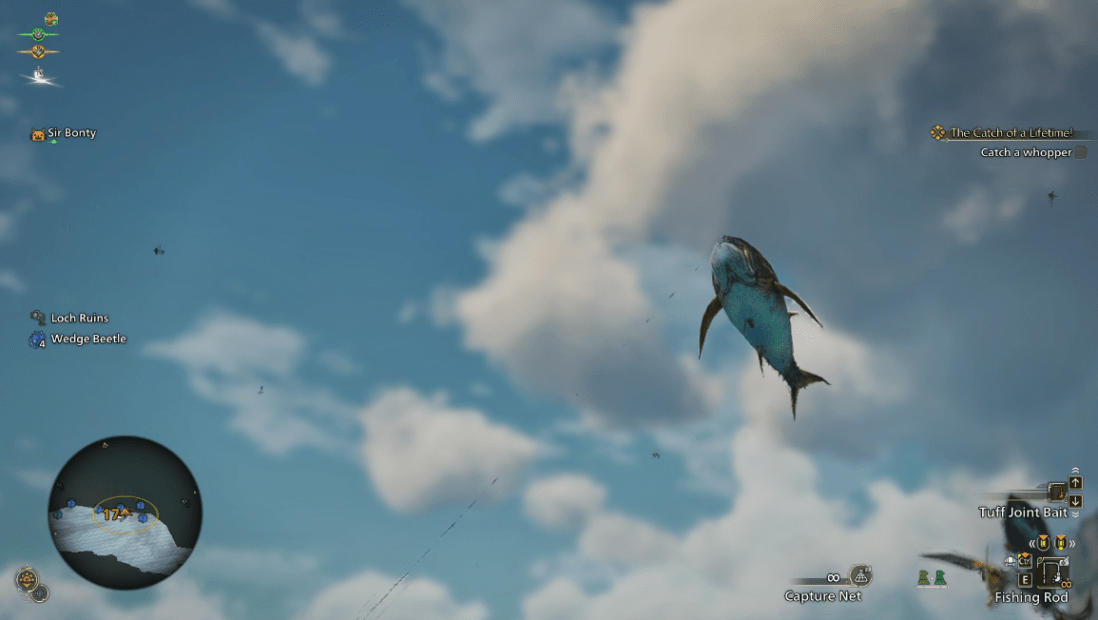
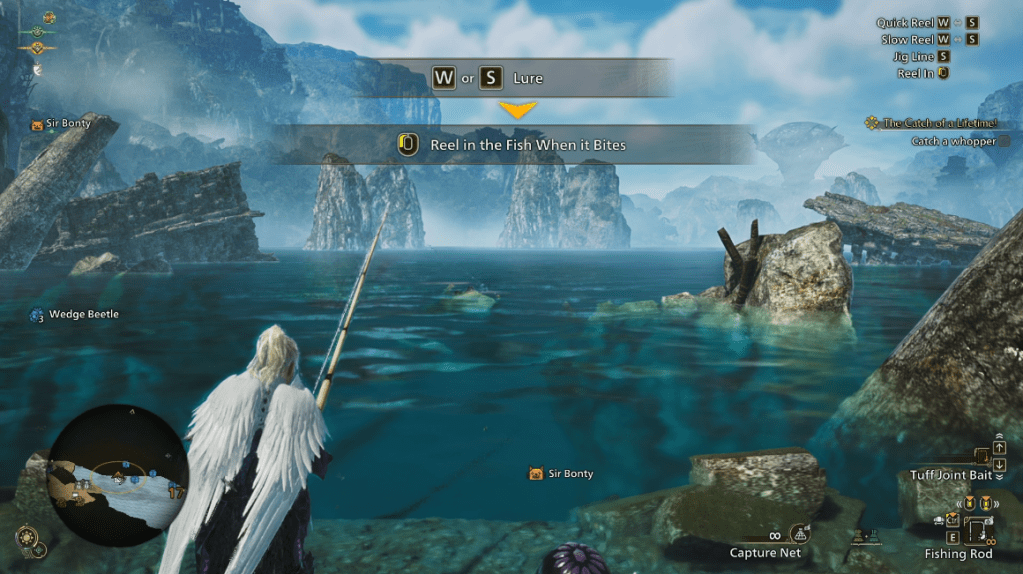
When you first reach Area 17 and cast your line you will realize that the fish does not bite easily with the Tuff Joint Bait equipped. The instructions are not that clear and you may end up staring at the open waters for quite a while. Basically you will have to not just jig the line but sometimes actually alternate between the W and S key on PC (or whatever you have set the movement keys up and down to).
Location
Go to the area below popup camp 17 where you first fought the Uth Duna. You will notice a vast expanse of water at the northern edge of this location. Find a spot with a school of fish or wander about till you notice the big fish with fins popping out of the water. Cast you line here and alternate between the up and down arrow keys to attract the fish. At first you might attract the smaller fish but eventually the big ones will get attracted towards it.
Method to keep the line tact
Follow the fish’s movements using character movement keys (WSAD for PC). Mostly it will move side to side but sometimes it will jump out of the water at this time you have to follow its movement using all directions its moving towards, up when it jumps out press the movement key in the direction it’s pointing, multiple if necessary and then press the left click on the mouse to restrain it. Slight side to side movements are also required at times.
Obstacles
When a fish hits an obstacle like a rock or cuts your line of sight make sure to press the movement key of the opposite direction.
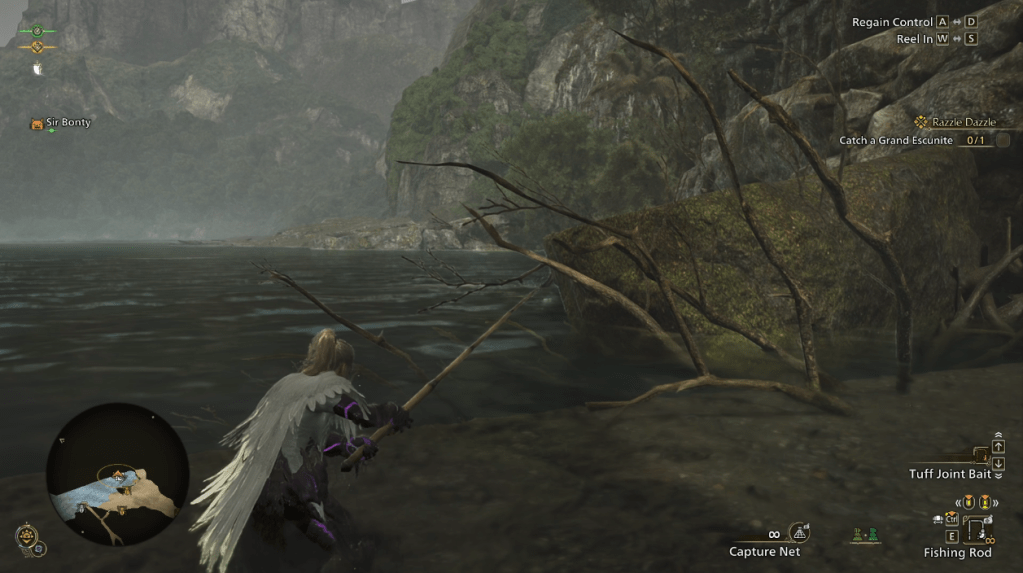
Method to reel it in
When the fish is finally tired there will be a momentary pause in it’s movements. At this time quickly alternate between the Up and Down movement (W and S for PC) keys. Make sure to follow its movements again once it gets agitated. Keep following this process and you will have caught the whopper in no time.
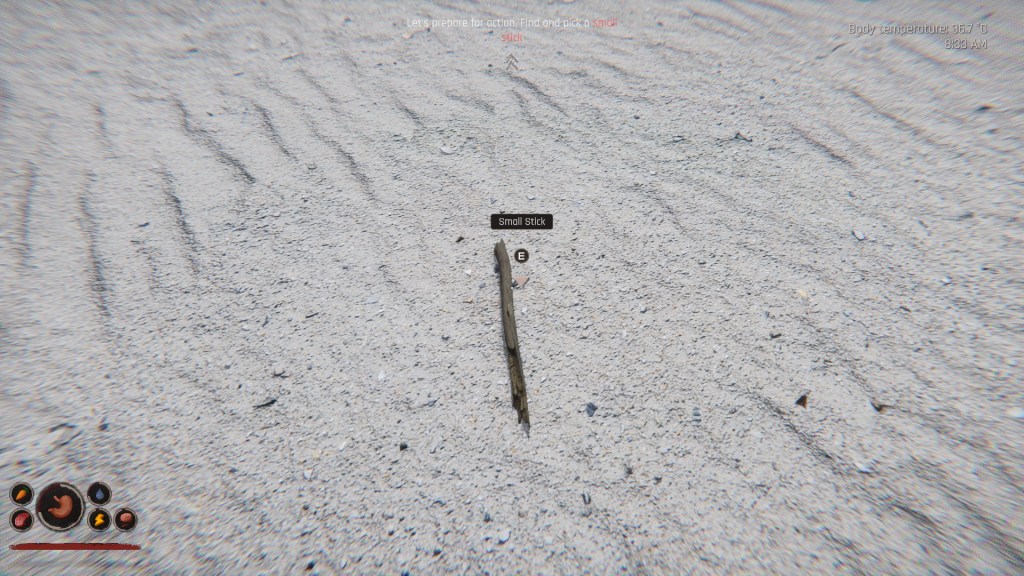
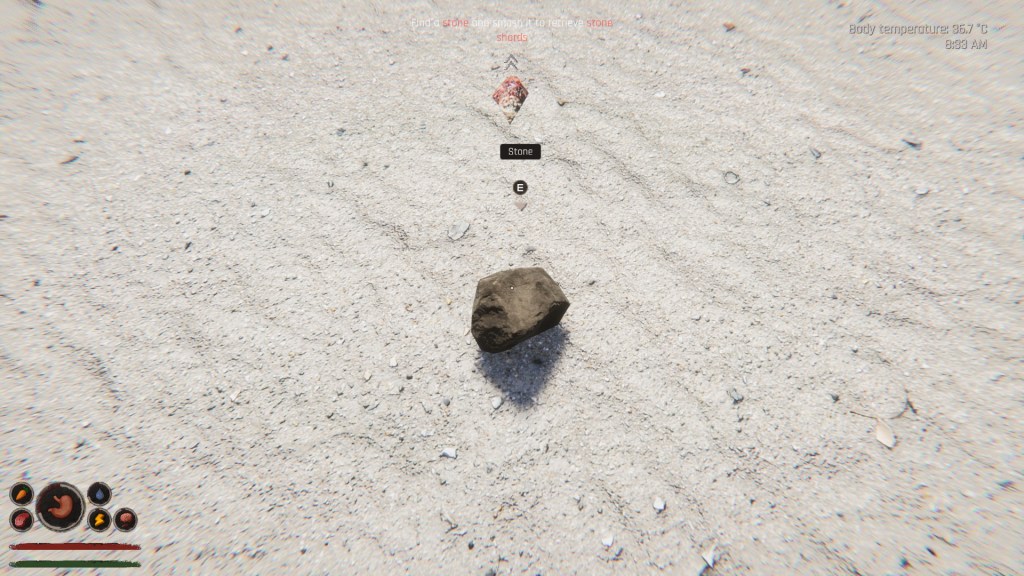
A recently released early access survival in which the protagonist goes in search for his missing relative, good old Seamus Alevary. The game starts with the player’s character is seen recording a message on a tape recorder as a last ditch effort to inform whoever finds it about his mission and the current adversity he is facing. Upon crashing into the ocean you miraculously survive and have to swim to the shore of an unknown island which seems to be close enough to the last known location of where the person you came to search for, went missing. We are then tasked with the usual survival related tasks of acquiring food and building shelter and resistance from the environment. Below we shall see what are the initial requirements for setting ourselves up on this unknown shore.
Materials:
Sticks and rocks and your priority at the start. You will find these scattered along the shores and in the forested area as well. Collect a few as we will need these to create the basic tools that are required to harvest resources and build structures.
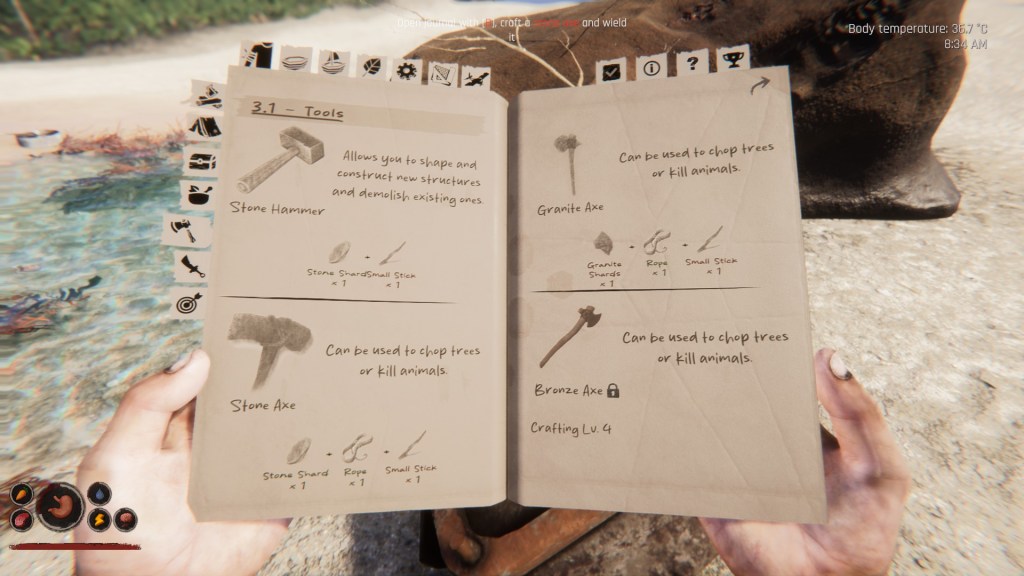
Tools:
The stone hammer and stone axe are the basic tools required at the end. With the stone axe you will be able to cut down palm trees as well as kill small creatures for meat and materials. The stone hammer on the other hand is required to build structures.
Important Materials:
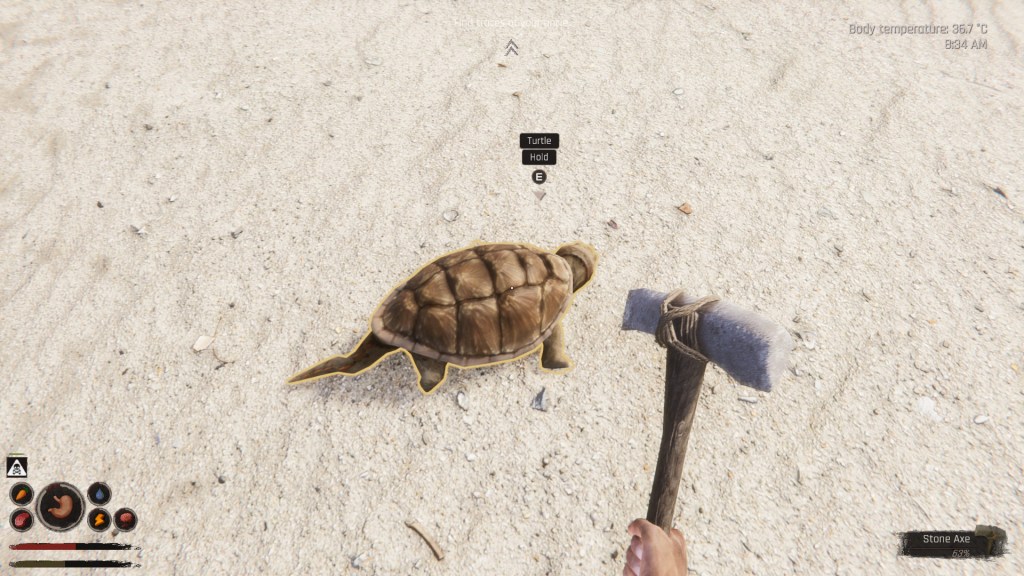
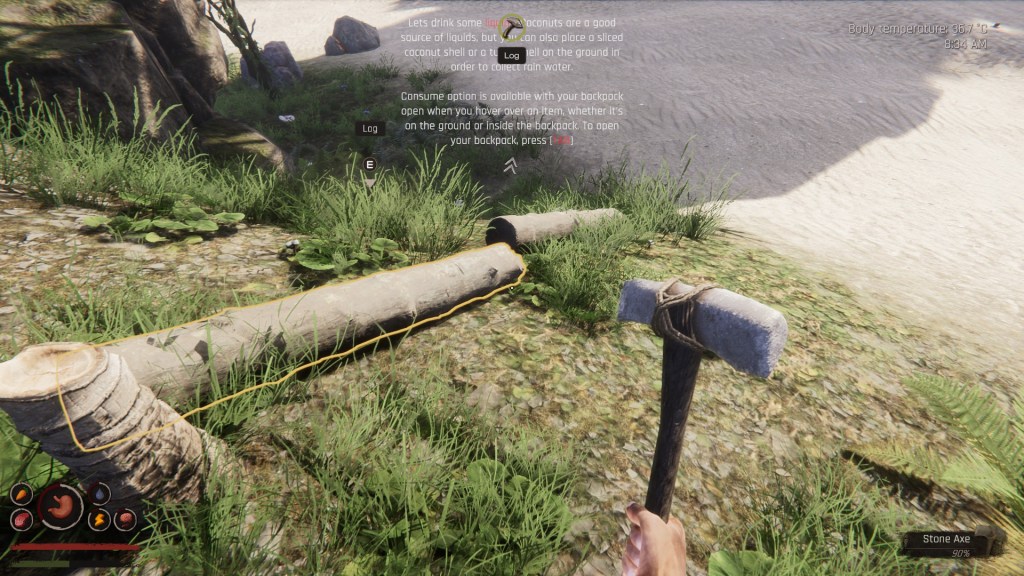
Next with the tools we have built we will first cut the palm trees to harvest Logs, Palm Frond and Coconuts. Logs and Palm Fronds can be used to build structures, whereas Coconuts can be used to replenish Hunger and Thirst. The axe can also be used to kill turtles in order to harvest meat and shell. You can craft the stone knife as well to kill creatures and harvest certain plants.
Saving the game:
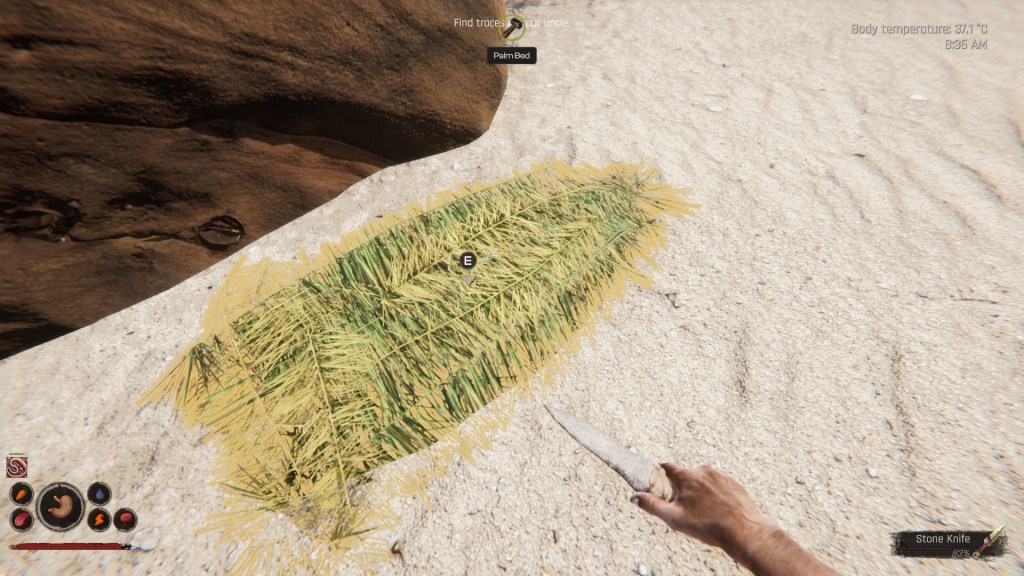
Now with the Palm Fronds you can build a bed, with which you can interact to save the game as well as rest. This can be accessed by opening the journal by pressing the ‘B’ key and then navigating to the Shelter & Beds section. It requires 6 Palm Fronds and these can be carried three at a time.
Healing:
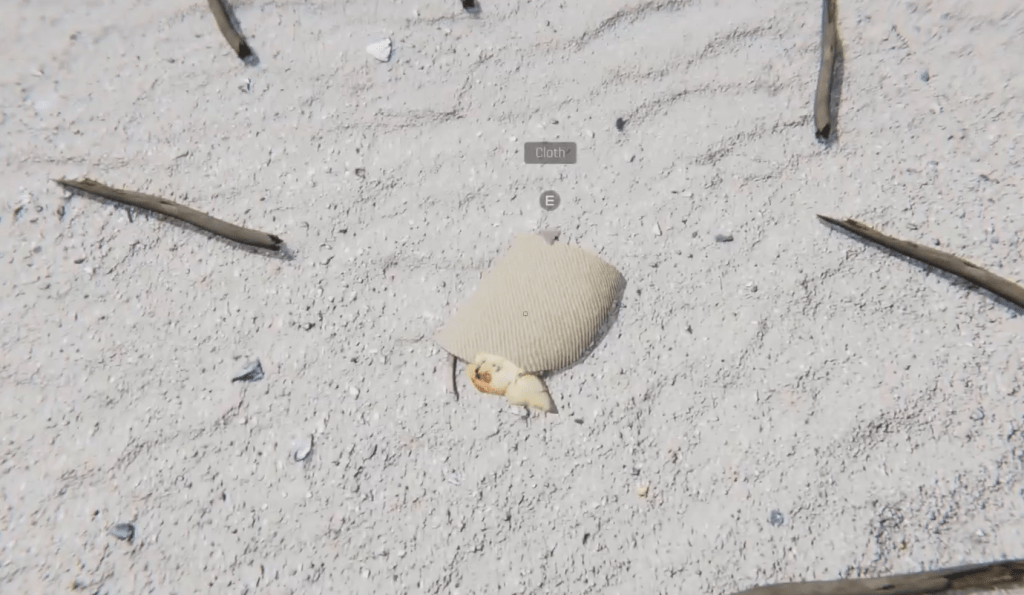
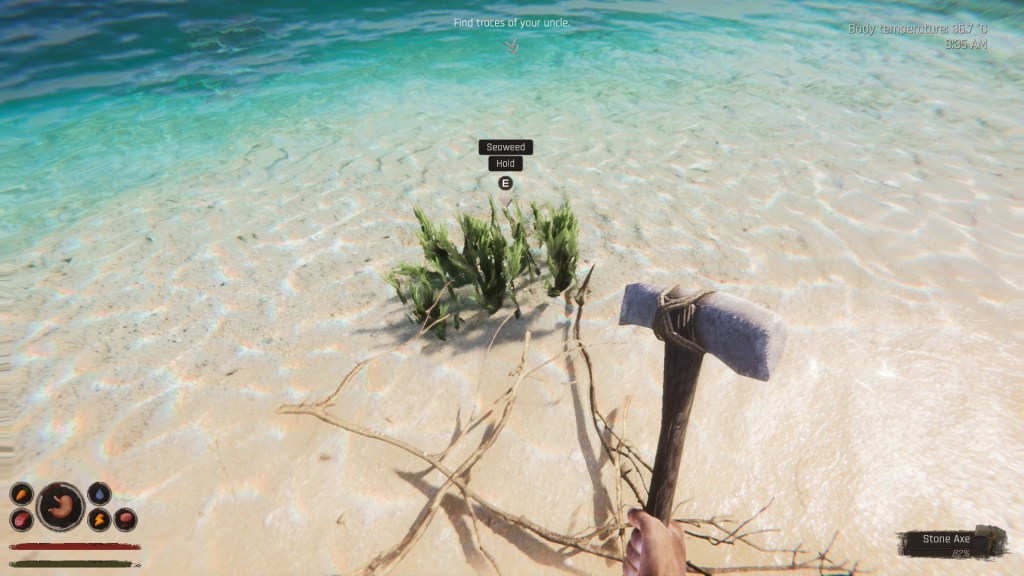
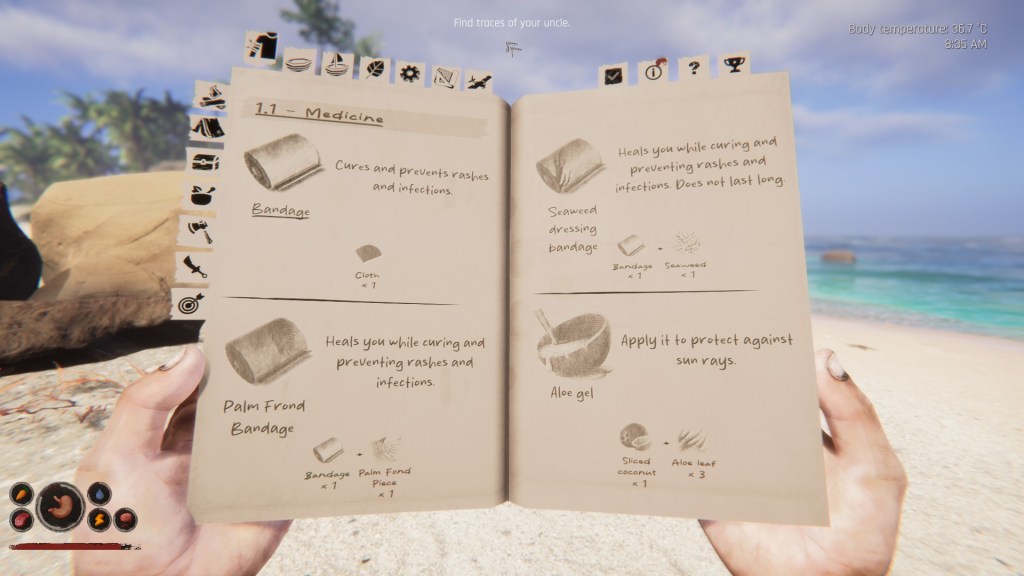
ClothSeaweedPalm FrondMedicine Section
Next we move to healing items since you might get too close to the aggressive animals or take fall damage or get inflicted by some ailment. So in order to create this you will require cloth to make a bandage and then some seaweed to create the Seaweed Dressing Bandage that will slowly heal as well as prevent infections and rashes. In place of Seaweed you can use palm fronds to create an even effective Palm Frond Bandage.
Structures
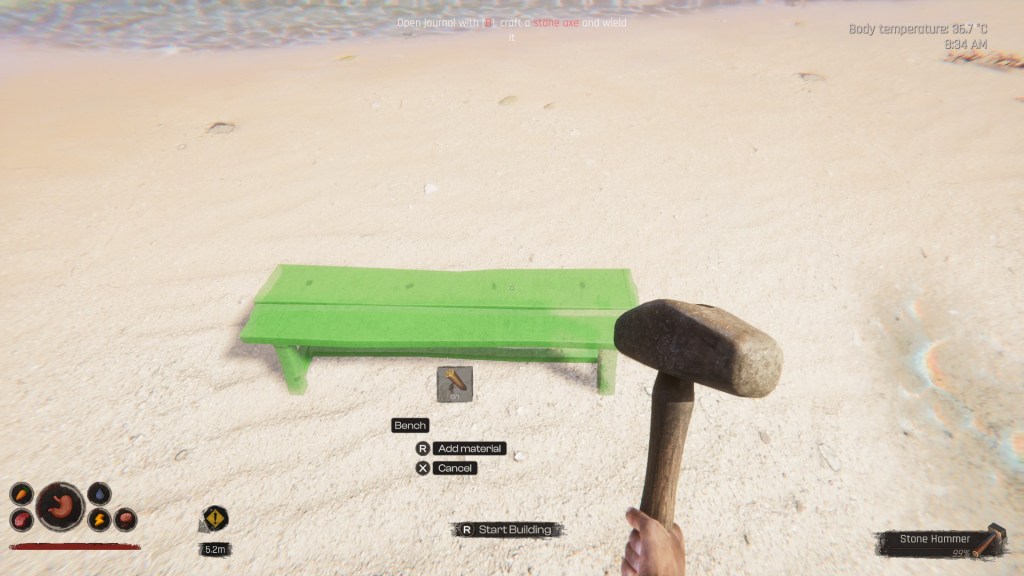
Structures can be built by first equipping the hammer and then pressing the ‘R’ key. After placing the structure you will need to add materials and then build it. Use the hammer to craft your much needed amenities. Using this menu you can create a variety of things but make note of the durability of the hammer. Use ‘Q’ and ‘E’ keys to vertically scroll through the items.
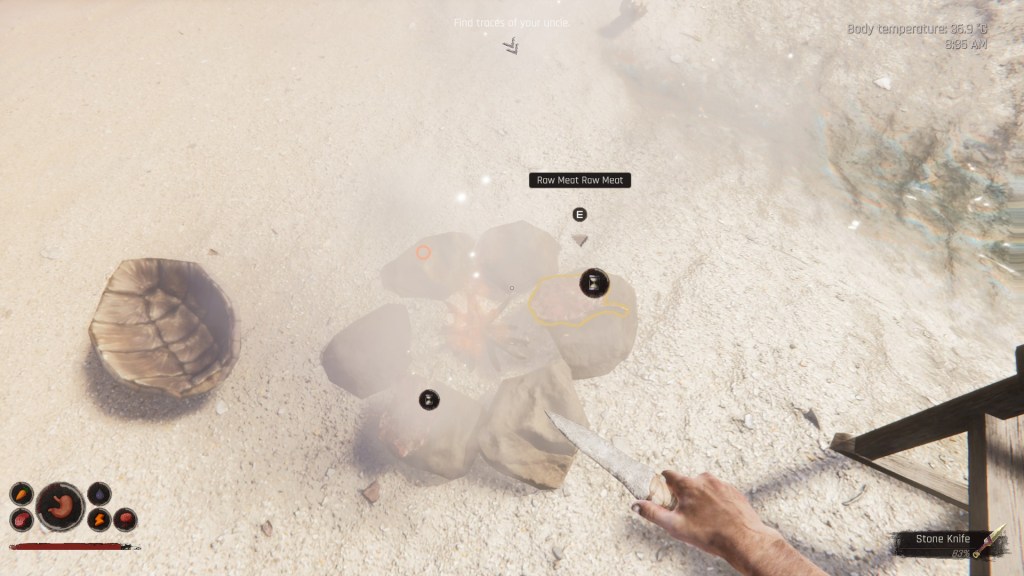
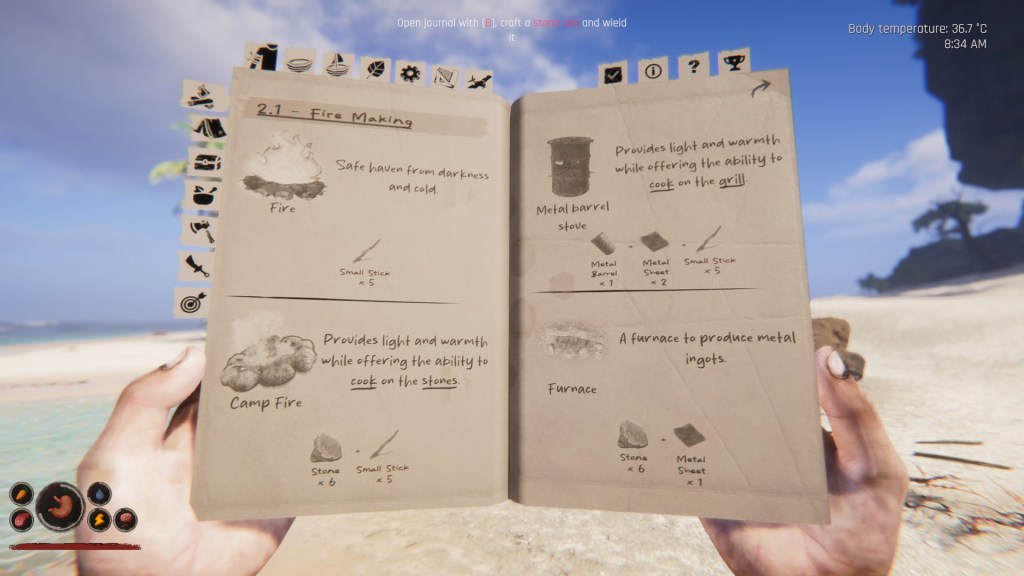
Campfire and Cooking
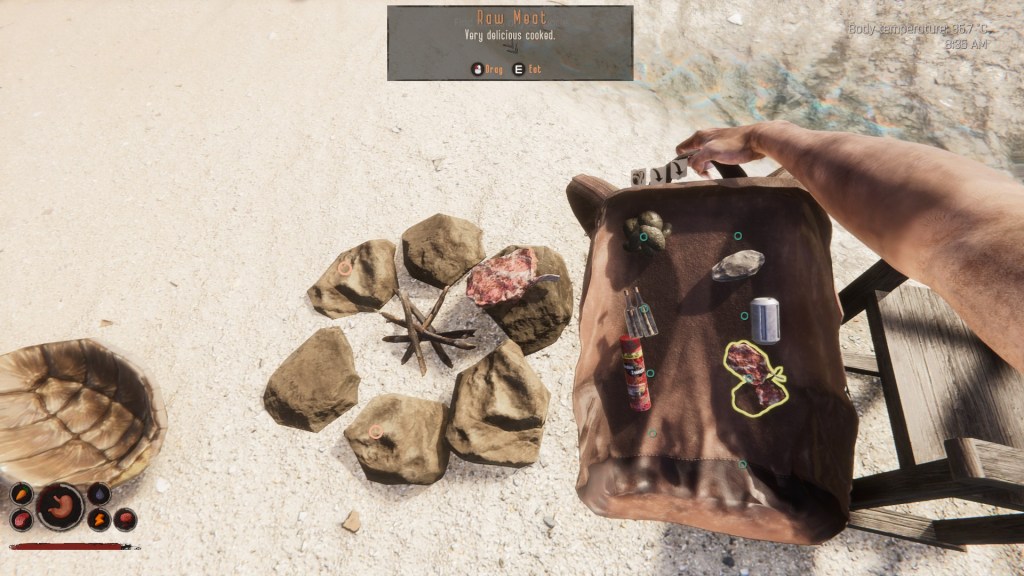
An important note here is that rocks can be carried 3 at a time. Make sure to create the Campfire by accessing the Fire Making section as this will allow you to cook meat that can be harvested by killing turtles or lizards. After building the campfire, open your backpack by pressing ‘TAB’ and then clicking on the arrows on top to access the inner bag space. Here select the meat then hover it over a stone with a circle icon over it, this allows you to place the meat. Next start the fire by repeatedly tapping the ‘F’ key. A timer will show above the meat that has been placed on the campfire. Once cooked make sure to pick it up. Uncooked meat will give the character indigestion or parasites.
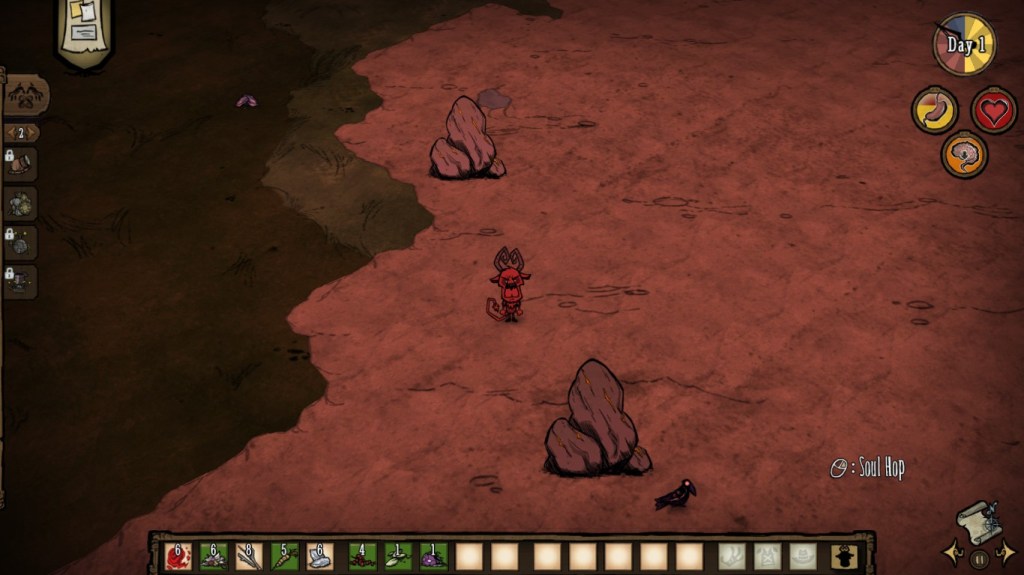
Don’t Starve is an absolutely marvelous indie game if you like dark and gloomy themes and just want to relax on a weekend, who knows it might even brighten your day. A perfect setup for a multiplayer game where you have to frequently adapt to whatever the game throws at you just like normal life. Co-ordination and allocation of tasks is a key aspect when playing with a group of friends to make things. This guide will help you get a perfect start as it emphasizes on materials and tools required to make it feel seamless and also a brief introduction to what can be considered an ideal spot to build your camp at.
Phase I – Basic Requirements:
Tools:
The first few crucial items required are Torch, Axe, Pickaxeand an optional item would be Garland which helps keep your sanity in check well unless you are playing as Wurt. So to craft the above items we will require the following materials:
3 Flint
5 Twig
12 flowers
2 Cut Grass
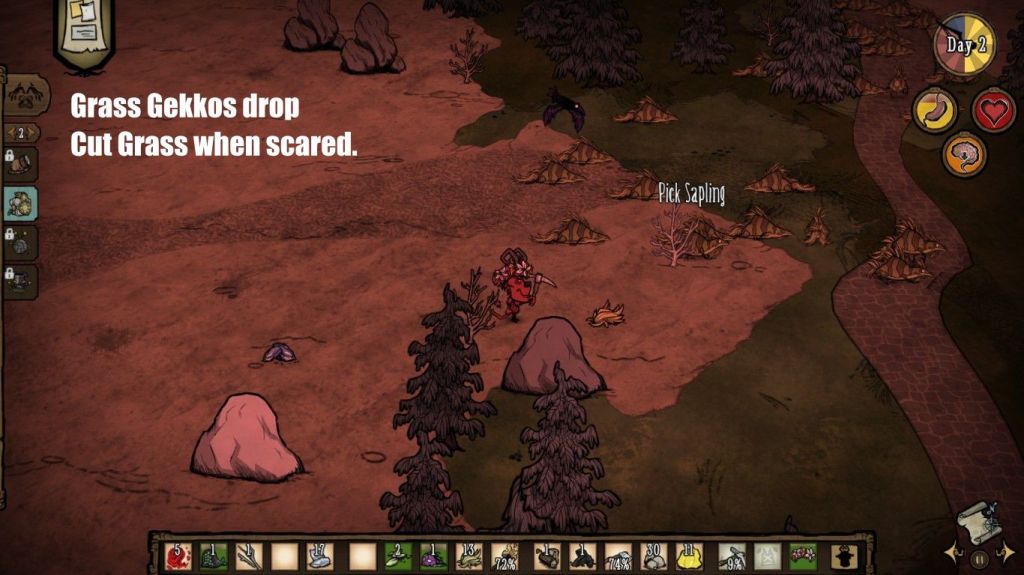
The above are the minimum requirements and you will need to find more as your tools break down. Flint can be found lying around in the Grasslands and Rockyland biomes, Twigs can be found in Grasslands. Cut Grass can be found in the Grasslands and Savanna biome.
Food:
In the beginning just keep picking up berries and carrots that you will find along the way. Keep consuming them to restore your hunger whenever it gets low. Along the way you might find seeds that birds will desperately try to eat, pick them up and store them for now. To kill a moleworm drop a flint on the floor as he pops out and tries to take it, you can kill it to get a morsel.
Camp Location:
An ideal spot would be at a location where there are lots of spiders, spiders preferred since they drop silk and spider glands apart from monster meat. The camp has to be placed a little bit further from these spots. In case you are playing as Wendy then a frog camp would be ideal.
Tips:
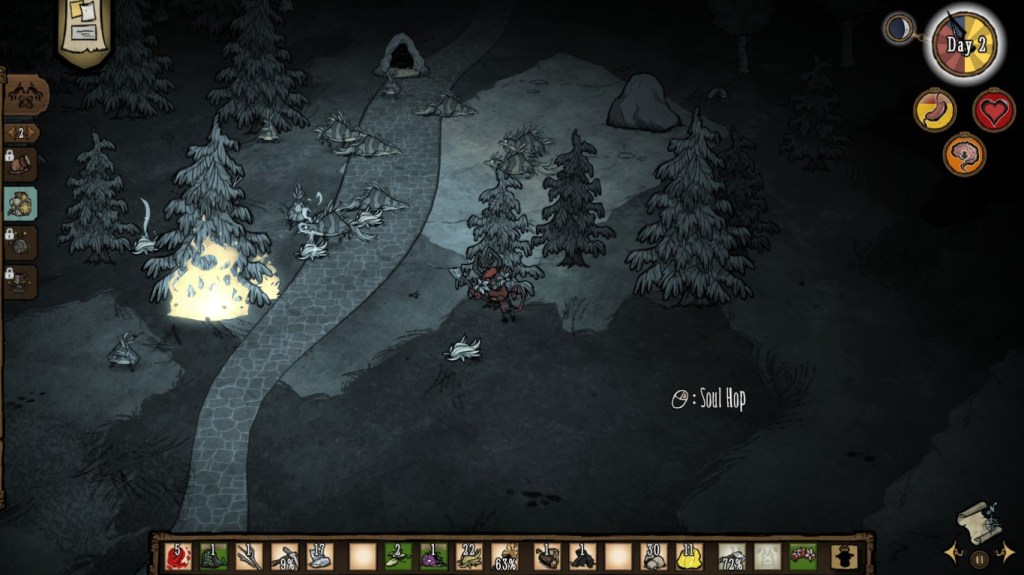
Save tree cutting for logs at night. Just before night time approaches make sure to be in a forest biome or a spot with a few trees, the moment its night light a tree (right click on a tree with torch equipped) on fire and start cutting trees with your axe that are further way.
Make sure to collect the charcoal from the burnt trees. If its burning (slight steam rising from it) just collect it once to put off the fire then collect it asap again.
Don’t pick extra stuff like flowers(more than what is required to make a garland), nitre, mushrooms, annoying mandrakes and dark flowers. Focus on getting to the Science Machine and setting up camp.
If you were unable to craft a torch make sure to run towards the entrance, the Florid Postern.
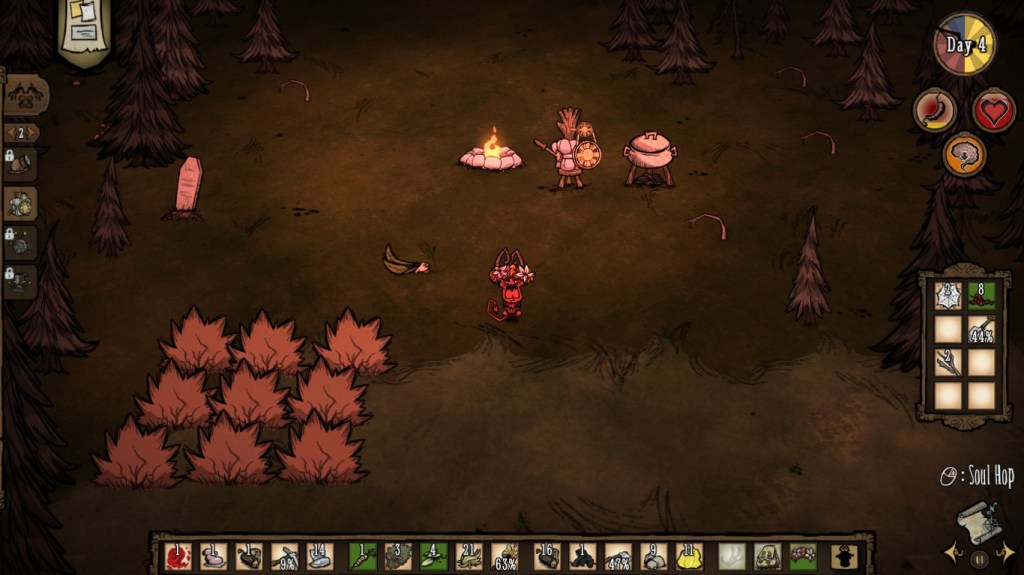
Phase II – Building the camp
Now on to the next part where we need to setup our camp. First and foremost we need to build a Science Machine to prototype the Backpack, Shovel, Crock Pot, build a Fire Pit and an Alchemy Engine.
22 Logs
28 Rocks
2 Twigs
9 Gold
6 Charcoal
2 Flint
For this we need to find the Rockylands area. In this area there will be two types of Rocks one is a plain looking one and the other will be the one which has golden veins across its surface. We need to break down the one with the golden veins as they drop gold, rocks, flint and nitre. Don’t pick up nitre for now.
Once you have all the necessary items mentioned in the list above proceed to the location with spiders, if you haven’t found one yet just build a temporary Science Machine and just craft the Backpack for now, then farm the extra gold, logs and rocks for the one to build at your base.
In case you already have a good spot for your base, build the science machine and craft the Backpack and equip it. Next craft the Fire Pit, then the Crockpot, Shovel and finally the Alchemy Engine. It is much easier to craft now in Don’t Starve together as you can find the item you need and click on it and if the materials that are part of the recipe themselves need to be crafted they will show a “+”. You can hover over them to find out what materials are required.
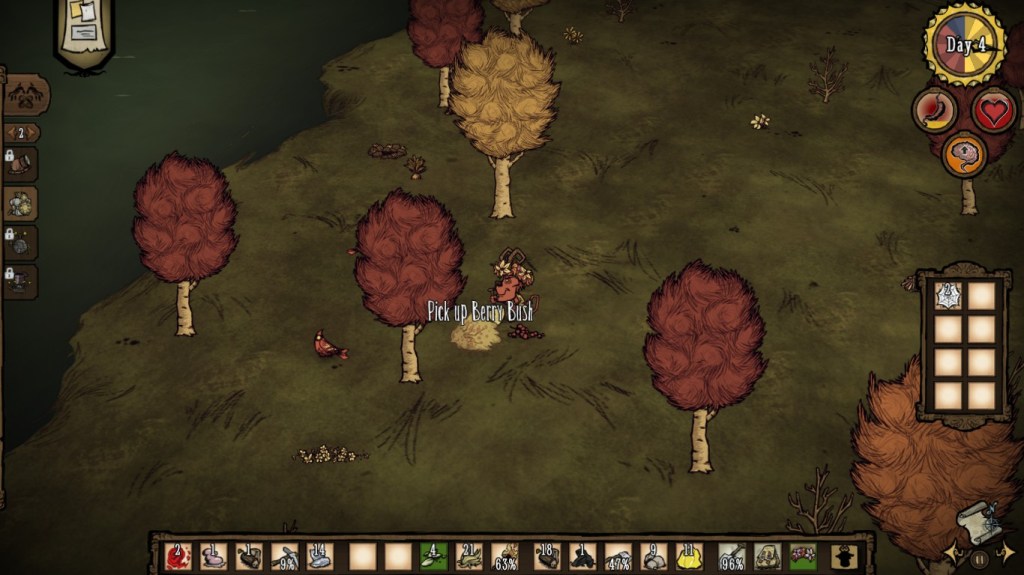
Next we have to gather the berry bushes to plant them at the base. Here we use the Shovel to dig up the berry bushes (if you don’t have inventory slots make note of the locations and come back once you have the backpack). Make sure you don’t forget to prototype it at the base near the science machine. Use rotten food to fertilize the bushes
Food:
The easiest crockpot recipe for hunger is the one for Meatballs (1 meat + 3 veggies) and to restore health it’s Trail Mix (1 roasted birch nut + 2 berries + 1 twig). Spider Glands are also a good source of healing and can be used to make Healing Salves.
Tips:
Build the base a little bit awayfrom the trees, water, frog ponds, spider nest, beefalo and pig houses.
Don’t venture into the swamp unless you are feeling brave or build a base in the swamp.
Conclusion:
Now that you are through with the initial phase, don’t waste time staying at the base for too long. Go out and explore. Plan ahead by checking for the next thing to do for which a few example would be crafting the Prestihatitator and the Shadow Manipulator. Also you can herd the Beefalo and adopt pets and don’t forget to find and fight the bosses. Apart from this you will have to prepare for Winter and Rains get proper equipment which will be discussed in further posts. Also don’t forget that there is an entire map of underground cave systems waiting for you to explore.